The agreement amongst all concerned parties is as follows: Farro, sometimes called emmer is an ancient grain that was eaten by the Babylonians, Sumerians and Romans for millennia and is still popular throughout Italy, France and Switzerland. It’s hearty, with a nice, slightly chewy texture. It’s low in fat, has only 100 calories per serving, has some protein (though less than quinoa) and it makes a mean spring summer salad! Whether you’re having it as a side or main dish, farro (also spelled faro or farrow) is a great way to change it up and get more whole grain in your diet. My classic farro salad (recipe to follow) with basil and ciliegine mozzarella is always a big hit at baby showers and pot lucks, where I get asked “What is this stuff?” followed by, “Can I have the recipe?” Seriously, it’s so easy, as long as you don’t boil it too long, you can make it with your eyes closed.
Now, ask chefs what exactly farro is and that’s where the consensus ends. Some say farro is nothing more than wheat berries, others say it’s spelt and others say it’s an earlier form of wheat and smaller than the traditional wheat berry. I’m of the last group and prefer the smaller looking grain to that of the larger. I usually buy bulk where I can find it. Usually, I find it labeled as “small whole wheat berries.” Other times, it’s labeled as einkorn. If I can’t find that, I buy the smallest looking spelt I can find. The pasta isle at Whole Foods has imported farro from Italy, costing about 4-5 bucks if I’m remembering correctly. It’s good. Get that stuff if you’re extra paranoid about buying the wrong thing. If you do, the grains will be medium-large which is totally fine and they’ve got a nice, bitable texture.
And at the end of the day, to be completely honest, they all taste about the same and are really, really good, so just go to your best grocery store and get some already!
Allergic to wheat or gluten? Forget about it! These recipes are for gluten eaters. Sorry!
If you want to soak it overnight, you can do that. Just cover it and stick it in the fridge. Doing so will cut the boiling time down by 40-50%.
To Cook:
Rinse farro. For one cup, you’ll add 1 ½ cups fresh, filtered water. Bring to a boil. Add some salt, like you do with pasta. Reduce to low and simmer for 25-30 minutes for unsoaked farro, 10-15 minutes for soaked. Of course, since the grains can vary, I’ve sometimes had to simmer it a bit longer. You don’t want to cook this stuff too long since it can get mushy. Just be sure to test it by sampling one of the grains to see if it’s ready. Remove with a slotted spoon and rinse under water. Pinch. It should be dense but yield slightly.
Once it’s done, drain and rinse under running water. If you’re making the either of the first two recipes listed below, you’ll want to stir in some high-quality extra virgin olive oil. It’ll soak in immediately and give the farro really great flavor. If you’re so inclined, you can salt it too, bearing in mind the saltiness of the stuff you’ll be adding later. If you’re making the Dill and Orange Farro Salad, stir in some orange juice and a little fresh lemon juice too and salt sparingly. You want the farro to soak up the citrusy goodness that will give your salad some zing.
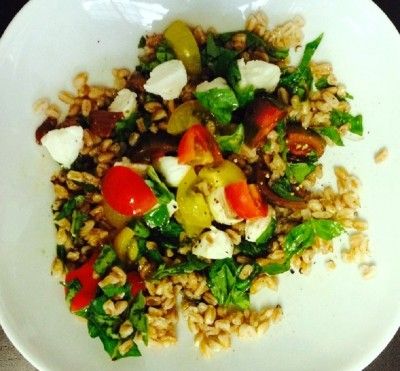
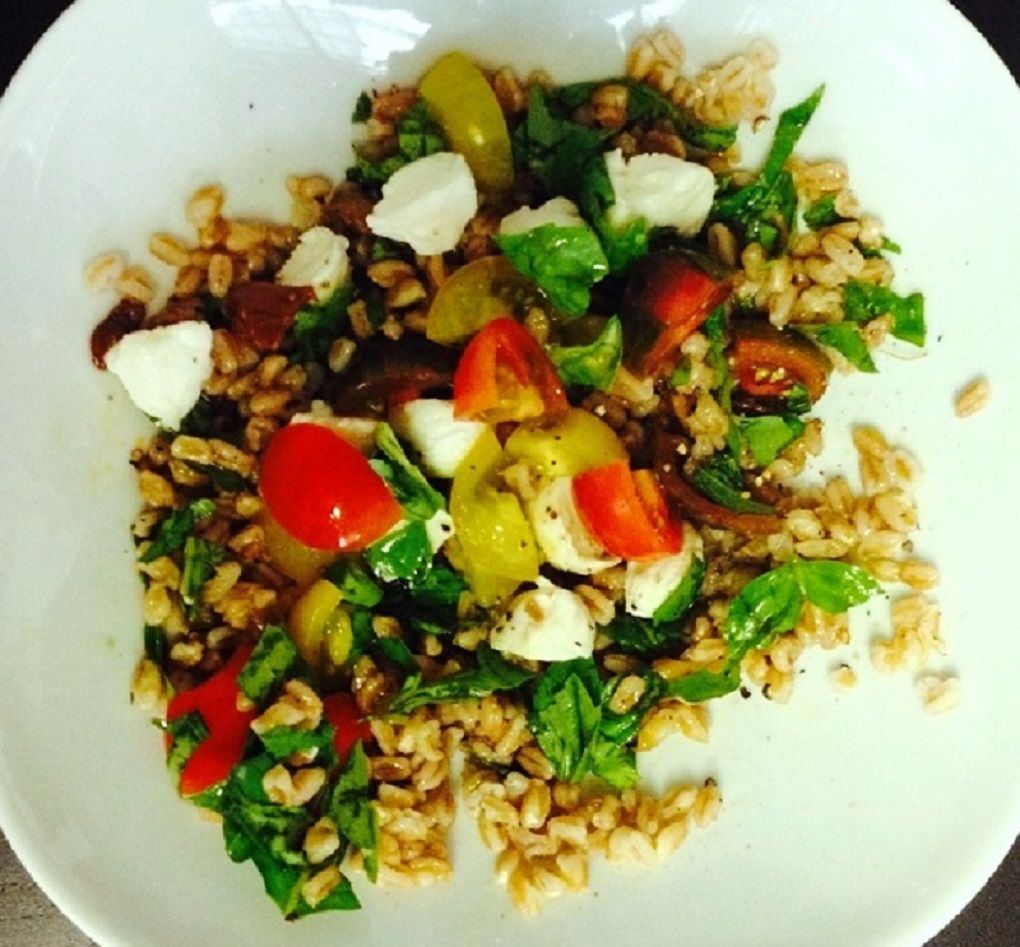
Classic Farro Salad

16 ounces cooked Farro*
10-15 ripe small tomatoes, halved (cherry, plum or mini-heirloom variety)
3 tablespoons Extra Virgin Olive Oil* (in addition to earlier)
1 tablespoon balsamic
15 leaves fresh basil (chiffonade or torn into small pieces)
1 8 ounce package fresh ciliegine (cherry sized) mozzarella balls, halved or quartered
1 ½ tablespoons olive tapenade or diced Kalamata olives
Sea Salt
Place cooked farro in a glass bowl. Combine olive oil and balsamic vinegar in separate dish, then quickly combine with farro. Scoop and turn to mix ingredients into farro. Do not smash. Add tapenade and combine. Add basil and combine. Salt halved tomatoes and combine. Lastly add halved ciliegine and combine. Cover with plastic wrap and allow to set in fridge for a minimum of 30 minutes. Season to taste with salt and fresh cracked black pepper (if desired). Enjoy!
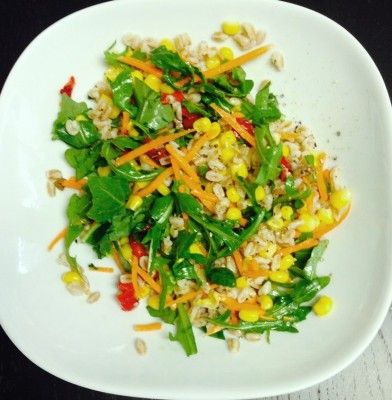
Arugula and Corn Farro Salad

16 ounces cooked Farro*
8 ounces arugula
6 ounces corn (canned or cooked “on the cobb”)
4 ounces carrots (slivered)
4 ounces roasted peppers, chopped (jar)
3 1/2 tablespoons Extra Virgin Olive Oil**
1 tablespoon Brigg’s apple cider
2 ½ ounces golden raisins, optional (soaked and plumped)
1 clove garlic, optional (minced fine)
Place rinsed and dried arugula in a separate bowl. Toss with ½ tablespoon olive oil to coat.
Place cooked farro in a glass bowl. Combine olive oil and apple cider vinegar in separate dish, then quickly combine with farro. One by one, add garlic, peppers, corn, carrots and lastly add arugula. Season to taste with sea salt and fresh cracked black pepper (if desired). You may let salad set in fridge to allow flavors to set. If making the night before, keep arugula separate. The salad will look better if you combine it into the salad just before serving.
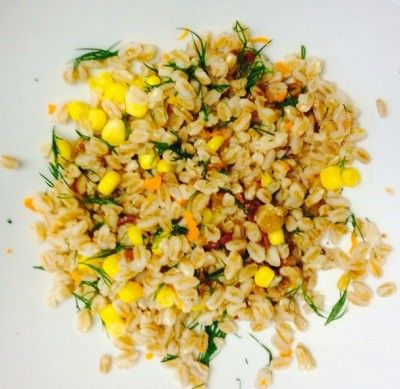
Citrus and Dill Farro Salad

16 ounces farro cooked Farro
4 ounces corn (canned or “cooked on the cob”)
4 sprigs fresh dill (plucked)
Zest of one orange
½ cup orange juice
½ fresh lemon
2 tablespoons Extra Virgin Olive Oil
1 tablespoon olive tapenade
1 tablespoon sherry vinegar, optional
1 ½ tablespoon orange marmalade
2 ½ ounces golden raisins, optional (soaked in orange juice)
Salt and Black pepper to taste
Remember, for this recipe, do not toss the farro in olive oil! Instead, immediately after that quick rinse and drain, combine farro with orange juice and the juice from a wedge of lemon. You want both the sweetness of the orange and the tartness of the lemon.
Now, heat up a small sauté pan and toast the zest on medium high heat to intensify its flavor. Add in the marmalade and let cool off the heat. Stir in one tablespoon olive oil and the sherry if you’re using it. Once that’s mixed and it’s room temperature, combine the mixture into the farro. Next, stir in the dill, then tapenade, then corn and raisins. Taste. Add more dill, lemon or any of the ingredients you like but remember to add dill and salt sparingly since both will intensify after setting.
Once mixed, let rest in fridge for minimum of 1-2 hours to let the dill do its work. Season afterwards with salt and cracked black pepper.
Was that easy enough? If you like grains and you like salad and don’t want to waste away those gorgeous spring and summer days chained to the stove, give faro a whirl!
Happy Eating!
Notes:
*measurement before cooking
**in addition to the oil used to coat farro immediately after cooking
Additional info on Farro:
Wikipedia Page on Farro


